Why is My iPhone Not Charging? 10 Fixes You Can Try (2022)
Charging an iPhone is a time consuming task, but what’s worse is when you connect your iPhone to the charger and then later find that it’s not charged at all. Though the “iPhone won’t charge issue” seems to be very annoying and confusing, there are actually a bunch of simple things you can do to fix the problem. So, let’s check out why your iPhone is not charging, as well as all the solutions you can try.

10 Tips to Fix iPhone Won’t Charge Issue (2022)
What are the Possible Reasons Why the iPhone is Not Charging?
There are four usual suspects you need to watch out for when you are unable to charge your iPhone.
- Damaged power adapter/Lightning Cable
- Uncertified charger
- Dirt that may have clogged up the charging port
- Bad charging habit
Apart from these major culprits, incompatible cases, rare software bugs, and even liquid damage could also be responsible for the charging issue on your iPhone. We are going to take into account each possible cause and resolve the problem using viable solutions accordingly.
Clean the Lightning Port
Before troubleshooting the software or hardware-related charging issues, you should ensure that your iPhone’s Lightning port is not clogged with dirt and debris. If it’s been a while since you cleaned the Lightning port of your iOS device, the port is likely to be packed with pocket lint which could be preventing the connector from making a strong and stable connection.
I prefer to use toothpicks to remove dirt from the Lightning port on my iPhone. They are not only more effective but also less likely to cause damage. I would recommend you pick flat toothpicks that have rounded tips as they lack sharpness.

To give some needed cushion to the cleaning process, it would also be a good idea to twist a little bit of cotton on the tip of your toothpick. Be sure to be extra cautious while cleaning so that you don’t accidentally damage the charging pins.
After you have cleaned the port, reboot the iPhone.
- On iPhone without home button: Press and hold the volume up/down button and the side button until the power off slider shows up on the screen. Now, drag the power off slider to shut down your iOS device. After waiting for a few seconds, press the side button to turn on your device.
- On iPhone with home button: Press and hold the side/top button to bring up the power off slider. After that, drag the slider to turn off your device. Now, wait for a few seconds and then hold down the side/top button to reboot your device.
Once your iPhone has restarted, plug it into a power source to check if the charging has begun. If it has, you’ve got the better of the issue.
Make Sure Your Charger is Not Damaged
If your iPhone is not charging even after you have cleaned the Lightning port, make sure your charger is not damaged. Take a close look at the area near the connector. If it is disjointed or appears to be frayed out, use another Lightning cable†
Keep Liquid Damage in Mind
Not many folks would be aware of the fact that liquid damage can also cause the charging issue on the iPhone. It is because liquid damage tends to short out the connections located in the charging port which hinders charging. So, if you dropped your iOS device in water, make sure to first dry it out before plugging in the charger.
Bear in mind that even a little bit of water inside the port can cause the connections to short which could not only damage the charging capability but also lead to more terrible problems.
Ensure That Your Case is Compatible
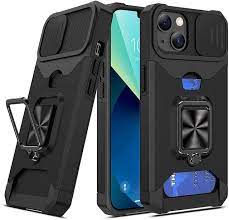
If you are trying to charge your iPhone through a Qi wireless charger, make sure that the case is compatible with wireless charging. If you are using a magnetic, ring holder or a heavy-duty case, the problem could be with your cover and not the iPhone.
Does the Charging Stop at 80%? Disable Optimized Battery Charging
iPhone keeps a track of your daily charging routine and automatically delays charging fits 80% in certain situations. This is a well-thought-out feature designed to improve the lifespan of the battery. However, if you would rather have complete control over the charging of your device, you can choose to disable the optimized battery charging feature.
- Head over to the Settings app on your iPhone -> Battery -> Battery Health† Now, turn off/on Optimized Battery Charging as per your needs.
Hard Reset Your iPhone
If your iPhone still won’t charge, it’s time to give it a hard reset. For those uninitiated, hard reset (also known as force restart) gets rid of random cache and temporary which often results in fixing common issues with iPhones†
- On iPhone 8 or later: Press the volume up button. Then, press the volume down button. Next, press and hold the side button until the screen goes black and the Apple logo comes up on the screen.
- On iPhone 7/7 Plus: Press and hold the side button and the volume down button simultaneously until the Apple logo shows up on the screen.
- On iPhone 6s/6s Plus or earlier: Hold down the side or top button and the home button at once until you see the Apple logo on the screen.
Note:
- While it’s not a full-on solution per se, I would recommend you avoid using your device when it’s being juiced up. Playing music or streaming videos while the device is being powered up tends to significantly slow down the charging speed. So, get rid of this bad charging habit for the better.
- Times when you are in a hurry, take advantage of the “Airplane Mode” hack (bring up the control contender -> airplane mode icon) to speed up the charging speed.
- Besides, force quitting all the apps running in the background could also do wonders in accelerating the charging speed of your iPhone.
Getting “Accessory May Not Be Supported” Error Message? Check MFi Compatibility
If you are getting the “Accessory May Not Be Supported” error repeatedly, there is a high chance that the charger is not MFi (Made for iPhone and iPad) certified. And it’s this incompatibility that is causing the charging issue on your iPhone.
Uncertified/fake chargers tend to charge comparatively slow which often leads to overheating problems† And with the lack of trusted safeguards against threats like short-circuits, overcurrent, and overcharging, the uncertified chargers could also damage your device. So, make sure your charger has MFi certification.
Reset All Settings
Factory reset is a pretty trusted catch-all fix. Especially when you are up against complex issues, this one has a role to play. So, if your iPhone is still refusing to charge, do not fail to try it out.
- In iOS 15 or later: Open the Settings app on your iPhone -> General -> Transfer or Reset iPhone -> Reset -> Reset All Settings.
- In iOS 14 or later: Launch the Settings app on your iPhone -> General -> Reset -> Reset All Settings.
Update Software
Considering how buggy modern versions of iOS (including iOS 15) are, you should never rule out the possibility of a rare bug that might be causing the charging issue. Hence, try updating the software on your iPhone.
- open the Settings app on your iPhone -> General -> Software Update† Now, download and install the latest version of iOS.
Restore Your iPhone As New
Restoring often comes to the rescue when basic tips fail to resolve complex issues. Hence, if none of the tricks has worked in fixing the charging issue on your iPhone, try restoring the iPhone as new – the so-called nuclear solution.
- Connect your iPhone to computer and then launch Finder/iTunes† after that, select your device and then back it up†
- Once the backup is done, click Restore iPhone† Once your device has been restored, set it up from the scratch. Along the way, you will get the option to back up the device from iCloud/iTunes backup. Do the needful and you are good to go!
Fixed iPhone Not Charging Issue
there you go! Hopefully, your iPhone has started to charge again. As stated above, you can often resolve this issue by cleaning the port, picking a certified charger, and giving a quick reboot to the device. So, make sure to keep these useful hacks at hand to deal with this common issue. Radical solutions like factory reset and restoring the device as new should be given a try only when the basic tips don’t click. If even they don’t get the job done for you, be sure to contact Apple Support at the earliest. Anyway, let me know your feedback in the comments and the solution that has worked for you.

